And we’re back! We hope everyone had a wonderful 4th of July weekend. Here’s a new tutorial from our very own Glory. Enjoy.
Eyelash extensions. Everybody’s getting them, everybody’s talking about them, and everybody’s going gaga over them. But the sad truth is, not everybody can afford them.
I stayed away from false lashes in the past because I was afraid of fake they’d look. That is, until I tried individual eyelashes.
Individual lashes gives you a very different feel to strip lashes. They are less uniform, so the effect is more random, feathery, and natural. You can achieve different effects depending on how many you apply and which lengths you use. And better yet, you can remove the extensions easily, along with the rest of your makeup, at the end of the day. You won’t need to worry about maintenance and costly touch-ups.
What you’ll need:
- Individual Lashes: Choose them in length variety. I used Knot Free Medium
- Glue: My pick is Duo waterproof false-lash adhesive clear
- Mirror
- Tweezers

What you’ll do:
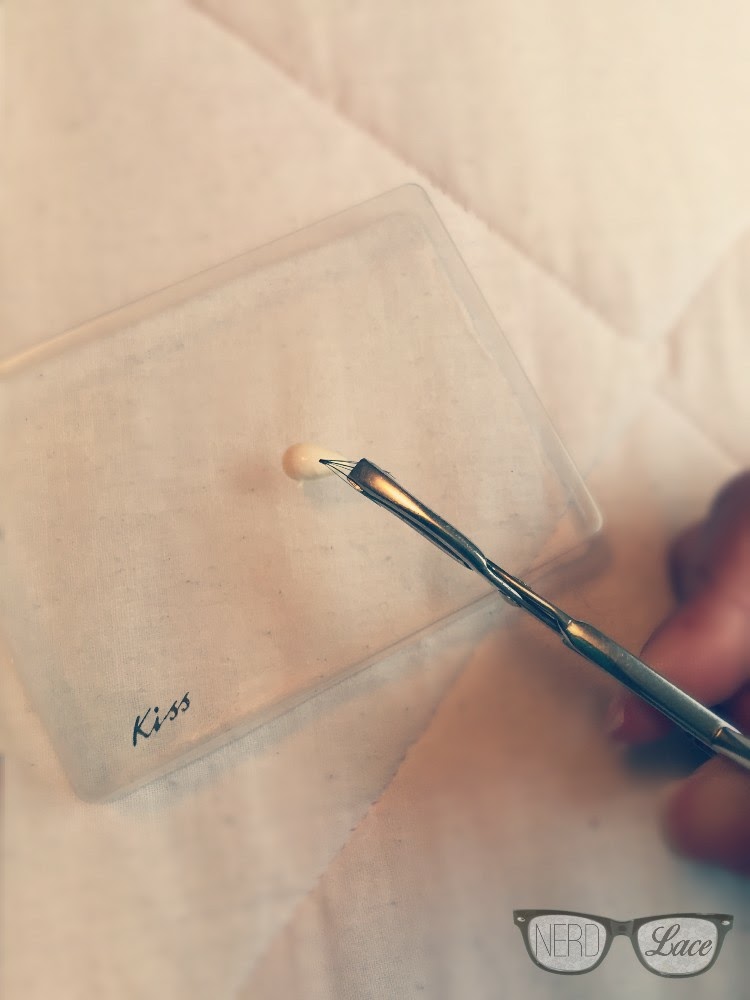
- Using the lash cover, I dab a small amount of glue.
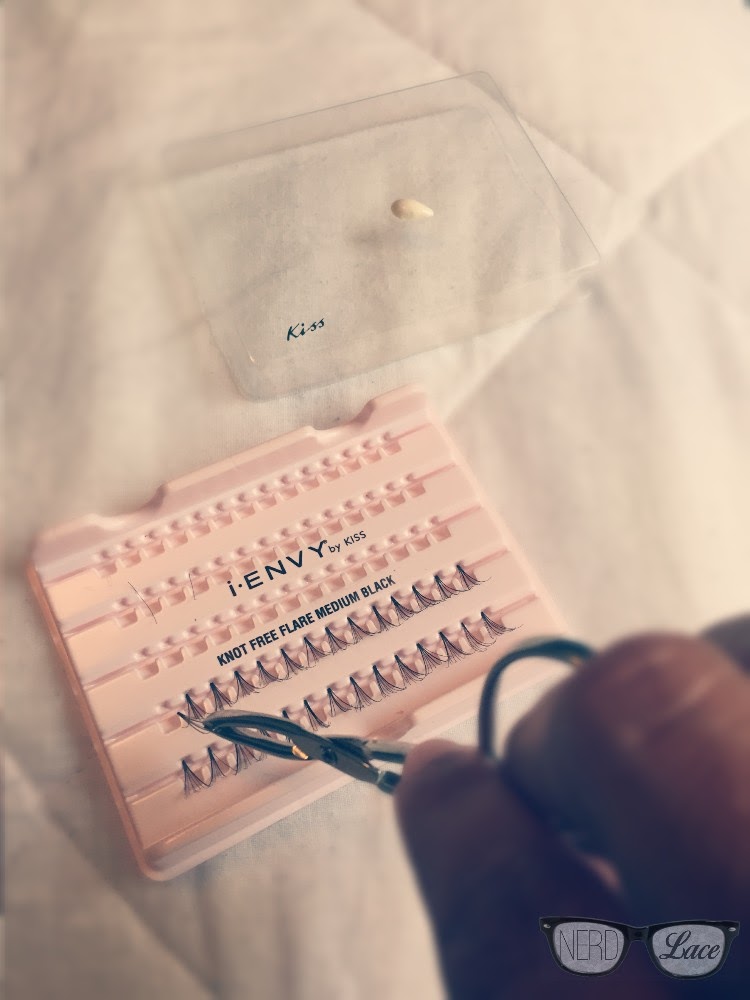
- Select one lash at a time and gently dip the end into the glue. A little goes a long way, so don’t overdo it.
- Close your eye and attach the lash to your existing lash line. Make sure the curl is following along with the natural curve of your lashes. I never apply the lash to my eyelid or skin because it doesn’t look as natural. You’ll generally have a minute or two to put it into place before the glue dries.
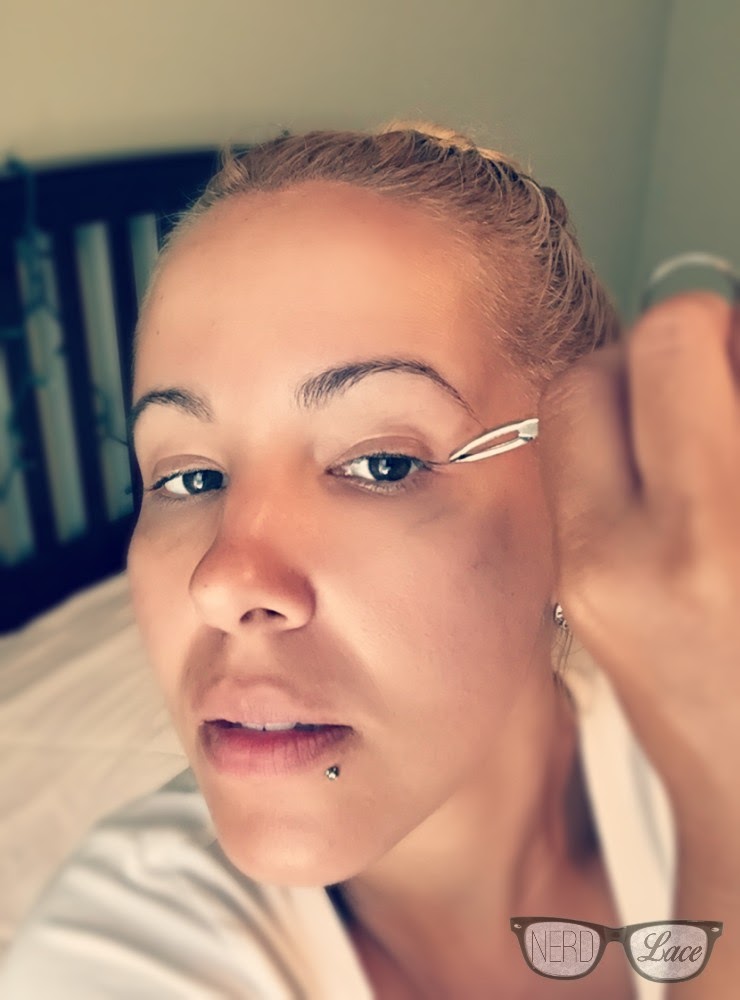
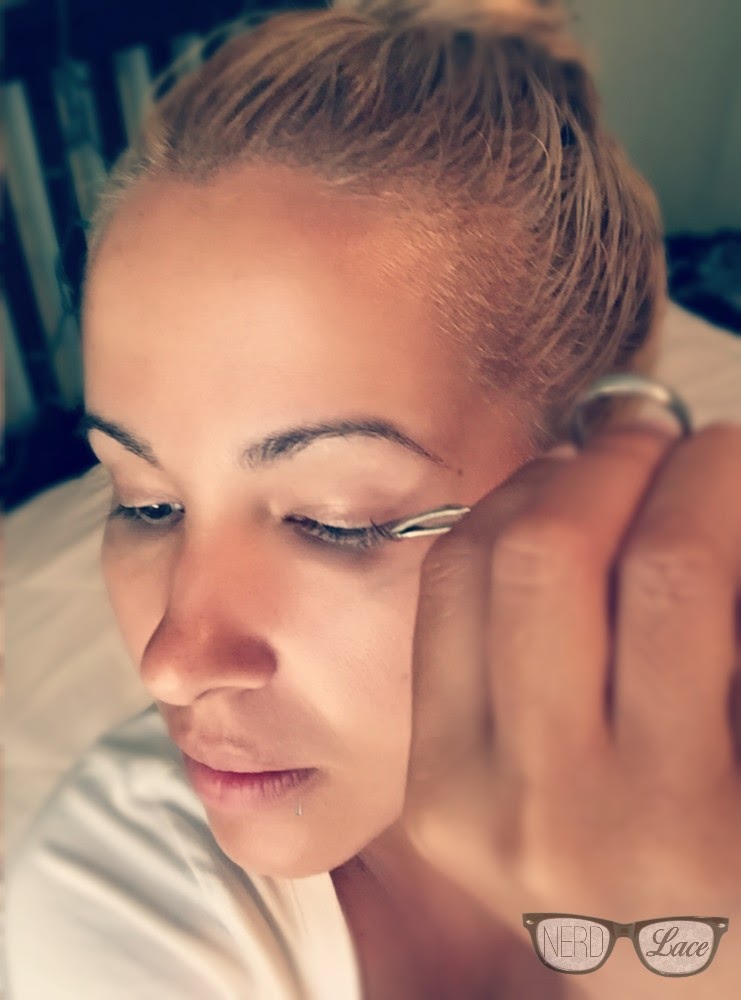
- Keep working from the outer lash inward, until you cover your entire lash line.


Cost:
- Kiss Individual Lashes: $2.99 USD
- Duo Adhesive: $9 USD (I’ve had it for over a year)
- Tweezers: $0.99 USD
- Mirror, come one everybody owns a mirror
An important thing to remember, If you plan on wearing eyeliner, apply it first. As it can be difficult to create a nice-straight line after you’ve put on the lashes. Today, I went without eyeliner since I am going for a more natural “no makeup” look.
This process may seem long at first, but don’t get frustrated, it’s totally worth it. And once you get the hang of it, you’ll see is really not as difficult as it looks. Remember, just like with regular strip lashes, practice makes perfect. In no time, you’ll be able to do your own eyelash extensions in minutes. Best of all, you didn’t spend hundreds of $$ to do it – YAY!
I have to tell you, I applied my lashes on July 4th, and today is July 7th and I am still wearing them without any touch ups. Mind you I have been sun bathing, working out, and dancing, and they’re still going strong.
Hope this can help you can apply your lashes and look fabulous. If you work on your lashes, make sure you share with us on social media by using the hashtags #nerdandlace and #NLbeauty. Also, follow us on Instagram, Facebook, and Twitter.
Keep calm and lash on!
Glory

Reblogged this on Glory Bourdier.